The ESP32 is a powerful microcontroller that has become incredibly popular for building Internet of Things (IoT) projects.
It boasts a dual-core processor, built-in Wi-Fi and Bluetooth, and a wealth of peripherals, making it perfect for projects ranging from simple sensor readings to complex network-connected devices.
Learning to program the ESP32 opens up a world of possibilities for creating your own smart devices and controlling them from anywhere.
You’re likely here because you’re looking for the best ESP32 courses on Udemy, but with so many options out there, it can be hard to choose the right one.
You want a course that’s comprehensive, well-structured, and taught by experienced instructors.
You’re also probably looking for a course that will teach you practical skills and help you build real-world projects.
For the best ESP32 course on Udemy, we recommend IoT Application Development with the ESP32 Using the ESP-IDF.
This comprehensive course covers the ESP-IDF, the official development framework from Espressif, which gives you access to the full power of the ESP32 and allows you to build advanced IoT applications.
The instructor, a seasoned developer, walks you through the entire process, from setting up your development environment to building sophisticated projects.
Of course, IoT Application Development with the ESP32 Using the ESP-IDF is just one of many great ESP32 courses on Udemy.
Keep reading for our full list of recommendations, categorized by learning level, topic, and project focus.
You’ll find the perfect course to launch your ESP32 journey!
IoT Application Development with the ESP32 Using the ESP-IDF

This course provides a comprehensive introduction to developing Internet of Things (IoT) applications using the ESP32 microcontroller and the Espressif IoT Development Framework (ESP-IDF).
You will learn how to set up the development environment, including installing the Eclipse IDE and configuring the ESP-IDF build system with CMake.
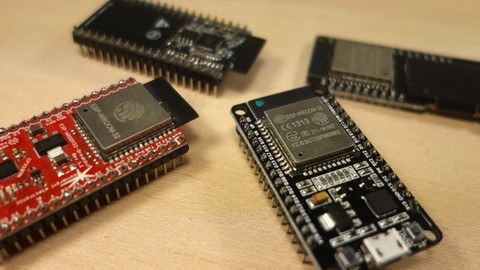
The course starts by covering the ESP32 hardware and its various development kits.
You’ll then dive into the ESP-IDF, exploring topics like FreeRTOS, error handling, and coding style guidelines.
Additionally, you’ll learn how to work with the Components & Sensors Library, which allows you to integrate sensors like the BME680 into your projects.
One of the core projects you’ll build is an RGB LED application that demonstrates how to control an LED’s color using the ESP32’s GPIO pins.
This hands-on experience will prepare you for more advanced topics, such as setting up a WiFi connection and creating an HTTP server to serve web pages from the ESP32.
The course also covers over-the-air (OTA) firmware updates, allowing you to remotely update your ESP32 devices without physical access.
You’ll integrate sensors like the DHT22 temperature and humidity sensor, and learn how to display sensor data on a web page served by the ESP32’s HTTP server.
Another key aspect is WiFi connection management, including implementing a WiFi connect feature and displaying connection information on a web page.
You’ll also learn how to use non-volatile storage (NVS) to store and retrieve data, even after the ESP32 is powered off.
The course explores advanced topics like using interrupts and semaphores to create a WiFi reset button, synchronizing time using the SNTP protocol, and displaying the ESP32’s access point SSID on a web page.
Finally, you’ll dive into AWS IoT, learning about MQTT, mTLS, AWS security policies, and JSON data formats.
You’ll build an application that publishes and subscribes to MQTT topics, enabling communication between the ESP32 and AWS IoT services.
Throughout the course, you’ll have access to the source code repository, making it easy to follow along and experiment with the examples provided.
ESP32 For Arduino Makers
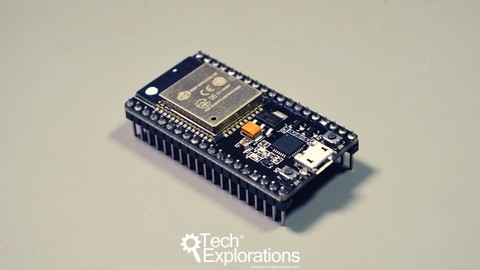
You’ll start with an introduction covering the required software and hardware, including the ESP32 dev kit itself.
This prepares you for the hands-on projects ahead.
Next, you’ll dive into the ESP32’s capabilities - its GPIO pins, communication protocols, power management, and how it compares to Arduino boards.
Understanding these fundamentals is crucial.
The course walks you through setting up the ESP32 with the Arduino IDE on both Mac and Windows, including installing the necessary drivers.
You’ll be ready to start coding right away.
From there, it’s a journey through practical projects utilizing the ESP32’s features.
You’ll learn to control LEDs, including PWM for brightness and using an RGB LED.
Reading inputs like buttons, potentiometers, and analog sensors is covered.
The course explores the ESP32’s DAC (digital-to-analog converter), showing you how to generate analog waveforms and even make noise!
GPIO interrupts are also explained.
Several sensor modules are integrated, like a photoresistor, BME280 environmental sensor, accelerometer, touch sensor, and using the built-in Hall effect sensor.
You’ll work with displays such as LCDs, 7-segment displays, and 8x8 LED matrices.
Controlling DC motors via a motor driver and using servo motors is included.
Data storage is covered through the EEPROM and SPIFFS file system.
You’ll build projects involving date/time-keeping using the DS3231 RTC module.
Wireless capabilities take center stage with Wi-Fi projects like connecting to networks, HTTP/HTTPS clients, and an HTTPS-controlled LED demo.
Bluetooth is explored in-depth, with classic Bluetooth device communication and BLE (Bluetooth Low Energy) server projects.
Along this journey, you’ll gain experience with I2C, PWM, analog/digital I/O, and see the ESP32’s power in action through creative projects.
MicroPython with the ESP32
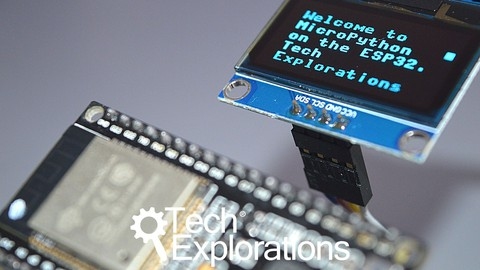
This course provides a comprehensive introduction to MicroPython programming with the ESP32 microcontroller.
You will learn how to set up your development environment, write code, and interact with various components and sensors.
The course starts by explaining what MicroPython is and why it’s useful.
You’ll install the required software like the Thonny IDE and learn how to upload the MicroPython firmware to your ESP32 board.
The course covers the basics of the MicroPython shell, uploading/downloading files, and running programs at boot.
You’ll quickly dive into Python programming concepts like variables, data types, operators, strings, lists, dictionaries, loops, conditionals, functions, and classes.
The course highlights coding considerations specific to MicroPython.
A major focus is on interfacing with hardware components.
You’ll learn to blink LEDs using loops and timers, read buttons with interrupts, use PWM to fade LEDs, and read analog sensors like potentiometers.
The course covers popular sensors like DHT22, BME280 for environmental data, touch sensors, accelerometers, and ultrasonic distance sensors.
For displays, you’ll work with LCD screens using I2C, various OLED displays, NeoPixels, and matrix displays.
You’ll also control servo and DC motors using drivers like the DRV8871.
The course dives into the ESP32’s WiFi capabilities, making HTTP GET and POST requests to services like Dweet, IFTTT, and OpenWeatherMap API.
You’ll explore other features like hardware timers, clock frequency control, deep sleep modes, RTC, and writing sensor data to CSV files.
Two capstone projects tie everything together - building a sensor station with an LCD display and creating a modular script structure.
A bonus lecture covers additional topics.
Advanced ESP32
This course offers an in-depth exploration of the ESP32 microcontroller’s advanced features.
You’ll gain practical insights into the ESP32’s capabilities, starting with an overview of its key features.
The first section dives into over-the-air (OTA) programming, a convenient way to update your ESP32 firmware wirelessly.
You’ll learn how OTA updates work, implement basic OTA programming, and explore cloud-based OTA solutions.
The course also covers using the WiFiManager library for easy WiFi configuration.
Next, you’ll explore FreeRTOS, a real-time operating system integrated into the ESP32.
You’ll understand concepts like tasks, queues, and semaphores, and learn how to implement dual-core multitasking and inter-task communication.
Performance benchmarking with FreeRTOS is also covered.
The course then focuses on the ESP32’s deep sleep modes, which can significantly reduce power consumption.
You’ll learn to implement deep sleep, configure external wake-up sources, and even build an OLED NTP clock that leverages deep sleep.
Additionally, you’ll work with the ESP32’s ultra-low-power coprocessor and analyze its assembly code.
Towards the end, the course guides you through setting up the ESP-IDF (Espressif IoT Development Framework) for advanced ESP32 development.
Throughout the course, you’ll find lectures addressing common questions and issues, ensuring you have a solid understanding of the topics covered.
Quizzes are also included to reinforce your learning.
Node-RED and ESP32 Project
The course starts by introducing you to what it covers and the required software and hardware.
You’ll learn about setting up the ESP32 controller circuit on a breadboard and designing a custom PCB enclosure using Fusion 360.
Next, you’ll prepare your Raspberry Pi by installing the operating system and configuring the hostname.
The course then dives into Node-RED, covering its installation, configuration, nodes, flows, messages, and more.
You’ll explore the Node-RED dashboard and learn how to create UI elements like text inputs, buttons, gauges, and sliders.
The course also covers MQTT, a protocol for IoT communication.
You’ll install the Mosquitto MQTT broker on your Raspberry Pi, learn about authentication, and integrate MQTT with Node-RED flows.
This will allow you to control and monitor your ESP32 device from the Node-RED dashboard.
The main project is building a terrarium controller with several prototypes.
In the first prototype, you’ll sense soil moisture and control a pump based on the readings.
The second prototype adds voltage sensing capabilities.
The third integrates data logging to a Google Sheet, while the fourth lets you set humidity thresholds from the dashboard.
Later iterations introduce a task scheduler for automating pump control and upgrading to the latest Node-RED versions with new features like flow groups, environment variables, and safe mode.
Throughout the course, you’ll review and test the ESP32 code (sketches), Node-RED flows, and the overall system.
The course covers upgrading Node.js, resetting passwords, and provides ideas for extending the project further.
Exploring the ESP32
You’ll start by getting an introduction to the ESP32 itself, including its key features and how it compares to the popular ESP8266.
From there, you’ll dive into working with the Sparkfun ESP32 Thing development board.
You’ll learn how to hook it up to the Arduino IDE and blink the on-board LED - a classic first step.
The course will also cover reading data from the board’s temperature, Hall Effect, and touch-sensitive GPIOs.
A major focus is on wireless connectivity with the ESP32.
You’ll explore Bluetooth Low Energy (BLE) and WiFi, understanding the differences between them.
You’ll then learn how to establish BLE connections, with the Thing acting as both a server and client.
For WiFi, you’ll connect the Thing to an access point and control the LED over the web.
The course even covers the important concept of RSSI for measuring signal strength.
The syllabus has a whole chapter dedicated to the Cayenne IoT project builder platform.
After an intro to the MQTT protocol it uses, you’ll interface the Thing with Cayenne using its API.
You’ll create widgets to visualize data, set custom message rates, and actuate the on-board LED using triggers and scheduling.
For a capstone project, you’ll build a “Smart Hallway” system using PIR motion sensors and a relay to control lights.
You’ll integrate the sensor data with Cayenne, using triggers to automatically turn lights on/off.
Finally, you’ll set up IFTTT applets to receive SMS notifications.
MicroPython for everyone using ESP32 / ESP8266 (Beginner)

This course is a comprehensive introduction to MicroPython programming for the ESP32 and ESP8266 microcontrollers.
You’ll start by setting up the required software like Python 3, Thonny IDE, and PuTTY on your Windows machine.
The course covers different methods to flash the MicroPython firmware onto your ESP device.
Once you have the firmware set up, you’ll dive into Python 3 syntax using MicroPython.
You’ll learn about basic constructs like print, input, conditional statements, loops, and creating functions.
This refresher on Python syntax will prepare you for programming the ESP microcontrollers.
A major part of the course focuses on controlling the GPIO pins on the ESP32 and ESP8266.
You’ll learn how to blink an LED, read analog values, use the capacitive touch pad, and interface with sensors like the DHT11 temperature/humidity sensor.
The course even covers using the ESP32’s built-in temperature sensor and hall effect sensor.
Moving beyond the hardware, you’ll learn how to connect your ESP device to a WiFi network automatically.
This WiFi connectivity then allows you to fetch weather data for any city using the OpenWeatherMap API over the internet.
The course walks you through making API calls in two parts.
With a blend of Python programming, microcontroller basics, sensor interfacing, and network communication, this course equips you with a versatile skillset for embedded programming using MicroPython on the popular ESP32 and ESP8266 platforms.
ROS ESP32 Interface for Real world Mobile Robotics
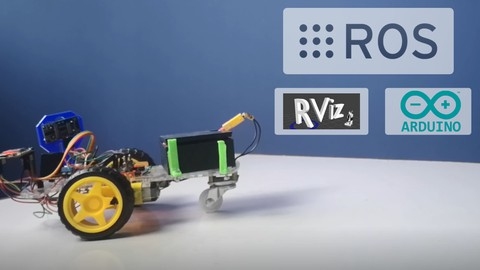
This course will take you on a journey to build a mobile robot using the ESP32 microcontroller and interface it with the Robot Operating System (ROS).
You’ll start by learning how to set up the ESP32 package for the Arduino IDE and integrate it with the RosSerial package.
This will allow you to create ROS publisher and subscriber nodes on the ESP32.
You’ll then dive into hands-on projects like toggling LEDs, publishing ultrasonic sensor data to ROS topics, and controlling a simulated robot in the Turtlesim environment.
As you progress, you’ll build an actual mobile robot using components like motors and an ESP32.
You’ll generate PWM signals from the ESP32 to control the robot’s motion and interface it with ROS over WiFi.
The course also covers essential concepts like handling interrupts from encoders, creating ROS services for controlling the robot’s movement, and implementing odometry using encoder data.
You’ll learn about transforms in ROS and visualize your robot’s position in the RViz environment.
Additionally, you’ll explore the use of an IMU sensor with ROS, diving deep into the code to understand its integration with your mobile robot.
Throughout the course, you’ll work with version control using Github, pushing your code updates to a remote repository.
This course provides a comprehensive learning experience, taking you from basic ROS-ESP32 communication to building a fully functional mobile robot with odometry, transforms, and sensor integration.
You’ll gain practical skills in embedded systems, robotics, and ROS, enabling you to tackle real-world mobile robotics projects.
Node-RED: IoT projects with ESP32, MQTT and Docker
This course provides a comprehensive guide to building IoT projects using ESP32 microcontrollers, MQTT protocol, and Docker containers.
You will learn to set up a development environment with Docker, including tools like Mosquitto MQTT broker, Node-RED, InfluxDB, Grafana, MariaDB, and Adminer.
The course starts by introducing you to Node-RED, a visual programming tool for wiring together hardware devices, APIs, and online services.
You’ll learn about MQTT, a lightweight messaging protocol widely used in IoT applications, including its terminology, network setup, quality of service, and best practices.
Moving on, you’ll dive into building practical IoT projects.
One project involves creating a mini weather station that measures temperature, barometric pressure, and light intensity using sensors like BMP180 and BH1750.
You’ll transmit sensor data to Node-RED, store it in InfluxDB, visualize it in Grafana, and even control a fan based on temperature thresholds.
Another exciting project is building an e-ink display to visualize weather data fetched from a REST API.
You’ll learn to align text, embed graphics, format data, and even 3D print a housing for the display.
The course also covers setting up a surveillance camera using the ESP32-Cam module, including motion detection, sending photos via MQTT and Telegram, and implementing machine learning for object recognition.
For time recording, you’ll build an RFID-based system using the TimeTagger application, allowing employees to check in and out, with data stored on a server.
Other projects include a time-controlled plant watering system with water level monitoring, smart plugs and relays controlled via MQTT and Node-RED, a mini IoT button with extended battery life, and an internet radio controlled through MQTT.
Throughout the course, you’ll work with various ESP32 boards like XIAO and gain experience with tools like VS Code, PlatformIO, and the Arduino IDE.
You’ll also learn about secure communication using MQTT with TLS encryption and analyze MQTT traffic with Wireshark.
ESP32 Bootcamp: A Step By Step Practical Approach
The course starts by introducing you to the world of IoT with ESP32, covering hardware and software requirements, pinouts, and setting up the development environment.
You’ll dive into coding right away, learning how to blink an LED and work with touch sensors, analog signals, and PWM signals for servo motor control.
This hands-on approach ensures you grasp the fundamentals of programming the ESP32.
But the course doesn’t stop there.
It also teaches you how to program the ESP32 without coding, using a user-friendly software interface.
You’ll learn to control LEDs, buttons, and even work with sensors like infrared obstacle avoidance.
Moving on, you’ll explore the powerful combination of ESP32 and Arduino, using the MQTT protocol for communication.
You’ll create an MQTT server account, code the ESP32 and Arduino boards, and establish a connection between them for data exchange.
The course then takes you through building an IoT smart garden project using ESP32 and the Blynk app.
You’ll learn the working principle, circuit connections, and coding for both the ESP32 and the Blynk app, allowing you to monitor and control your garden remotely.
Another exciting project involves controlling and displaying data from the ESP32 on a web page using a database.
You’ll learn to create an SQL table, write PHP scripts to insert and display data, and code the ESP32 to send sensor readings to the database.
The course also covers setting up the ESP32 as a web server, enabling you to create your own web pages and control devices over the internet.
You’ll understand the ESP32 operating modes, code the web server, and design HTML web pages.
Additionally, you’ll learn how to set up email alerts based on sensor readings using the SMTP protocol.
This involves creating an email account, configuring SMTP server settings, and coding the ESP32 to send alerts when sensor values exceed certain thresholds.
Throughout the course, you’ll work on practical projects, ensuring you gain hands-on experience with the concepts covered.
The course also includes bonus lectures, gifts, and coupons, adding extra value to your learning experience.