Arduino is a popular platform for hobbyists and professionals alike, allowing you to build exciting electronic projects using a microcontroller and a simple programming language.
Learning Arduino can open the door to creating interactive devices, automating tasks, and even exploring robotics and the Internet of Things (IoT).
But with so many Arduino courses available online, it can be challenging to find the best one for your needs.
You might be looking for a course that’s beginner-friendly, comprehensive, and teaches you everything you need to know to start building your own Arduino projects.
For the best Arduino course overall on Udemy, we recommend “Arduino Step by Step: Getting Started.”
This course is a comprehensive introduction to the Arduino platform, covering everything from the basics of hardware and programming to working with sensors and building your first projects.
The course is designed for beginners with no prior experience and is taught by an experienced instructor who provides clear explanations and engaging examples.
It covers essential topics like working with LEDs, buttons, and potentiometers, as well as integrating sensors and displays into your projects.
With its practical approach and well-structured curriculum, “Arduino Step by Step: Getting Started” is an excellent starting point for anyone wanting to learn Arduino.
While this is our top pick, there are other great options available on Udemy that cater to specific needs and learning styles.
If you’re looking for a course that focuses on advanced concepts, such as networking or robotics, or if you’re interested in a project-based learning approach, we’ve got you covered.
Keep reading to discover our full list of recommendations and find the perfect Arduino course for your learning journey.
Arduino Step by Step: Getting Started

This course provides a comprehensive introduction to the Arduino platform and programming.
You will learn the fundamentals of the Arduino hardware, programming environment, and various components and sensors that can be integrated with your Arduino projects.
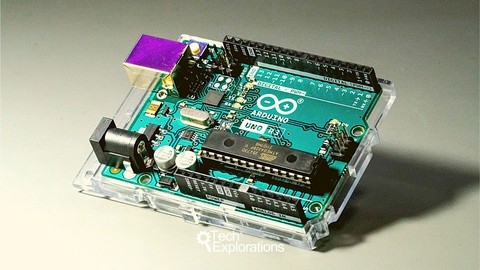
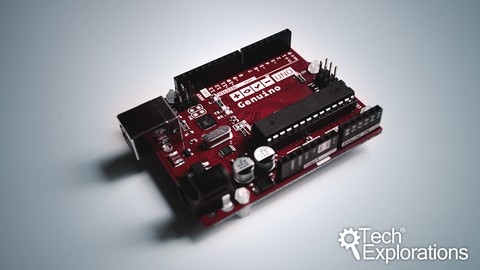
The course begins by introducing you to the Arduino board itself, explaining its components, pins, and functionalities.
You’ll learn how to set up the Arduino IDE (Integrated Development Environment) and upload your first program (sketch) to the board.
Next, you’ll dive into Arduino programming basics, including variables, functions, control structures (like if statements, loops), and how to control digital and analog input/output pins.
This knowledge will allow you to work with components such as LEDs, buttons, and potentiometers.
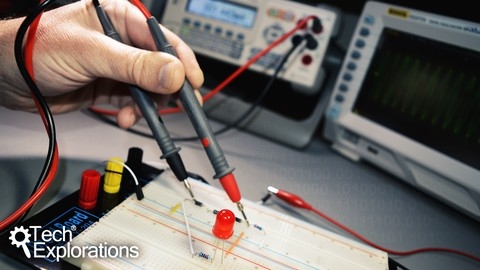
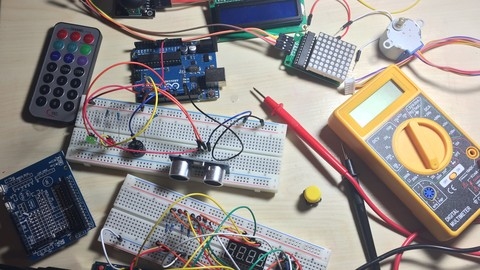
As you progress, the course covers essential topics like prototyping with a breadboard, using a multimeter, and soldering techniques.
You’ll learn about different communication protocols like serial, I2C, and SPI, which are crucial for interfacing with various sensors and devices.
The course then introduces you to a wide range of sensors, including light sensors (photoresistors, RGB color sensors), temperature and humidity sensors (DHT22, thermistors), accelerometers, infrared motion sensors, ultrasonic distance sensors, and sound sensors.
You’ll learn how to wire these sensors, read their data, and incorporate them into your Arduino projects.
Additionally, you’ll explore ways to create audible outputs using buzzers and display information on LCD screens.
The course even covers using shields and breakout boards to simplify the integration of components with your Arduino.
Throughout the course, you’ll work on practical examples and mini-projects, reinforcing your understanding of the concepts.
The lectures are accompanied by quizzes to test your knowledge at the end of each section.
Arduino Programming and Hardware Fundamentals with Hackster
You’ll start by setting up the Arduino software or simulator and modifying example code to control an LED or print a string.
The course then dives into programming basics, teaching you how to write Arduino programs from scratch.
You’ll learn to perform basic math operations, execute loops, call functions, and manipulate arrays and strings.
Along the way, you’ll tackle challenges like counting with variables, implementing FizzBuzz logic, computing averages, and converting text to “l33t sp34k.”
Next, you’ll explore electrical engineering fundamentals.
You’ll describe what makes up a circuit, read schematics, build circuits on a breadboard, and apply Ohm’s Law to calculate the required resistor values.
Challenges include finding the right resistor, computing equivalent resistance for series and parallel circuits, and designing voltage dividers and reverse polarity protection circuits.
The course then focuses on working with LEDs.
You’ll learn to control LEDs through code, adjust their brightness, and use libraries like NeoPixel to create fun patterns and effects.
Projects include building a Larson scanner and a color mixer.
User input is covered next, with lessons on reading digital signals from switches, buttons, and potentiometers (knobs).
You’ll build projects like an LED selector, a manual blink controller, and a fade knob.
The course also teaches you how to provide feedback to users through character LCDs and buzzers, allowing you to create a jukebox project that plays songs.
Sensors are introduced, enabling you to measure the physical world and react to surroundings.
You’ll work with light sensors, temperature sensors, ultrasonic distance sensors, and accelerometers, building projects like a night light, a thermometer, a digital theremin, and a burglar alarm.
Robotics is explored, with lessons on using transistors as switches, controlling DC motors and servo motors, and implementing an H-bridge for bidirectional motor control.
You’ll build projects like a speed controller and a light gauge.
The Internet is demystified, teaching you how to make HTTP requests from your Arduino to web pages.
You’ll learn about JSON and build a project to display local weather data.
The course culminates with a section on the Internet of Things (IoT), where you’ll log data to remote servers like ThingSpeak and perform actions based on retrieved data.
You’ll integrate with services like IFTTT and build an Internet-controlled light switch.
Finally, you’ll apply your newfound skills to design and build an Arduino-based project from scratch, leveraging techniques for planning, finding parts, and consulting documentation.
Basic electronics for Arduino Makers
This course is an introduction to the fundamentals of electronics, with a focus on practical applications for Arduino projects.
You will start by learning about the essential tools and components required for the course.
In the first section, you will dive into the basic concepts of electronics, including voltage, current, resistance, and the fundamental laws that govern them, such as Ohm’s Law and Kirchhoff’s Law.
These concepts lay the foundation for understanding how electronic circuits work.
Next, the course covers resistors in detail, including how to read resistor values, calculate power ratings, and use voltage and current dividers.
You will also learn about pull-up and pull-down resistors, which are essential for many Arduino projects.
The course then moves on to capacitors, exploring their use as energy storage devices and filters, as well as how to combine them in series and parallel configurations.
You will also learn about the RC time constant, a crucial concept in understanding the behavior of capacitors in circuits.
Diodes are another important component covered in the course.
You will learn about different types of diodes, including zener diodes and rectifier diodes, and their applications in voltage regulation and reverse polarity protection circuits.
The course also covers how to calculate the appropriate resistor value for an LED.
Transistors are introduced next, with a focus on bipolar transistors like the 2N2222.
You will learn how to calculate the currents in transistor circuits and explore practical applications, such as driving high-power LEDs and motors.
Finally, the course covers voltage regulators, including fixed and variable voltage regulators like the LM317.
You will learn how to design circuits with these regulators and calculate the necessary resistor values.
Throughout the course, you will encounter quizzes and practical examples that reinforce the concepts and help you apply your knowledge to real-world scenarios.
By the end, you will have a solid understanding of the fundamental electronics principles and be well-prepared to tackle Arduino projects with confidence.
Arduino For Beginners - 2024 Complete Course
You’ll begin by learning what Arduino is and setting up the development environment, including installing the Arduino IDE and creating a Tinkercad simulation account.
The course then dives into your first Arduino project - making an LED blink.
You’ll learn about the core Arduino functions like setup() and loop(), as well as how to debug your programs using the serial monitor.
From there, you’ll create physical circuits on a breadboard, working with components like LEDs, resistors, and push buttons.
The course provides a solid foundation in programming basics tailored for Arduino, covering variables, data types, functions, conditions, loops, and arrays.
You’ll apply these concepts to control LEDs, read input from push buttons and potentiometers, and use digital and analog pins effectively.
As you progress, you’ll learn advanced techniques like serial communication to send and receive data, time functionalities to improve your programs and multitask, debouncing push buttons, and using interrupts for responsive input handling.
The course also covers the EEPROM for saving values on the Arduino board.
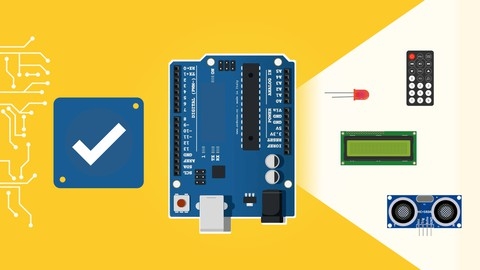
You’ll work with various sensors like ultrasonic for measuring distances, LCD screens for displaying text, IR remote controllers for interactive control, and photoresistors for measuring luminosity.
These components will be integrated into a final project - an interactive obstacle detection system with distance measurement, LED feedback, LCD display, IR remote control, and luminosity adjustment.
Throughout the course, you’ll complete hands-on activities to reinforce the concepts, with solutions provided.
The instructor also shares tips and best practices for creating your own Arduino projects.
PID Control with Arduino
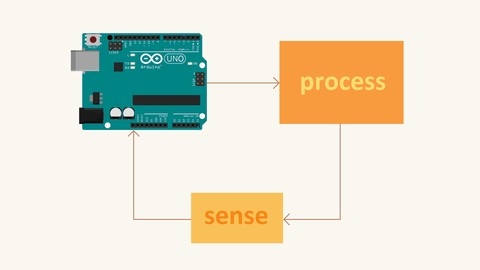
This course is a journey into the world of feedback systems and control theory using the Arduino platform.
You’ll start by learning the fundamentals of feedback systems and PID control, a powerful technique used in various industries to regulate processes accurately.
From there, you’ll dive into the individual components of PID control: proportional, integral, and derivative.
Each lecture breaks down these concepts, allowing you to understand their roles and how they contribute to the overall control algorithm.
But the real excitement begins when you get to implement the PID control algorithm on an Arduino board.
The course provides a template code, guiding you through the process of programming your very own PID controller.
This hands-on experience is invaluable, as you’ll see the theory come to life right before your eyes.
To further solidify your understanding, the course includes a demonstration of PID control in action.
Using a propeller arm example, you’ll witness the effects of adjusting the PID parameters and observe how they impact the system’s behavior, such as underdamped oscillations.
Finally, you’ll learn about PID tuning techniques, specifically the Ziegler–Nichols method.
This systematic approach will equip you with the skills to fine-tune your PID controller for optimal performance in various applications.
Arduino Step by Step Getting Serious
You’ll start with an introduction that covers the course structure, available resources, and how to navigate the lectures effectively.
The course then dives into a wide range of topics, including sensors like the BME280 environment sensor, MPU6050 motion sensor, and HMC5883 compass magnetometer.
You’ll learn how to wire these sensors and write sketches to read and process their data.
The course also covers input devices like flex sensors, membrane potentiometers, rotary encoders, and keypads.
You’ll learn how to integrate these components into your projects and handle user input.
One of the highlights is the extensive coverage of displays, including TFT screens, OLED displays, 8x8 LED matrices, and seven-segment displays.
You’ll learn how to wire these displays, use libraries to control them, and create custom user interfaces.
The course also delves into controlling various types of motors, including DC motors, servo motors, and stepper motors.
You’ll learn about different motor controllers, wiring configurations, and how to write sketches to control these motors precisely.
Networking is also covered in-depth, with sections on Ethernet, Wi-Fi (using the ATWIN1500 module), and Bluetooth Low Energy (BLE) connectivity.
You’ll learn how to set up these modules, communicate with them, and even control devices over the internet using services like Amazon S3.
Other topics include shift registers, real-time clocks, relays, GPS modules, and even creating your own printed circuit boards (PCBs).
The course also touches on advanced concepts like interrupts, memory management, and power management.
Throughout the course, you’ll work on practical projects that reinforce the concepts you’ve learned.
You’ll build things like a home notification board, a wireless communication system between an Arduino and a Raspberry Pi, and even a simple security system with a fingerprint scanner.
Hands-On Robotics with Arduino, Build 13 robot projects
This course is a guide to building and programming various robots using the Arduino platform.
You will start by learning the fundamentals of the Arduino microcontroller and setting up the development environment.
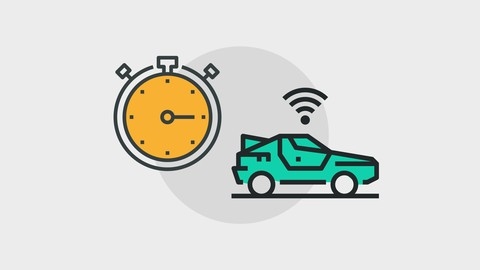
Next, you’ll construct a time-controlled robot by wiring components like DC motors and motor drivers.
The course covers key concepts like H-bridge circuits for motor control.
You’ll program the robot to move in different directions, take turns, and stop permanently using functions and infinite loops.
The course then dives into serial communication, allowing you to control an LED and the robot from a PC.
You’ll create your first Android app using AppInventor2 and explore wireless communication by building a Bluetooth-controlled LED project.
From there, you’ll develop more advanced Android apps to control robots wirelessly.
Projects include a “SmartBot” with on-screen buttons, an “AcceleroControl Robot” using the accelerometer sensor, and a voice-controlled “VoiceBot” leveraging speech recognition.
The course also covers line-following robots (black and white lines), object follower/repeller/avoider robots, and light follower/repeller/avoider robots using IR sensors.
You’ll learn the programming logic behind each type of robot.
Throughout the course, you’ll gain hands-on experience with Arduino programming, sensor integration, motor control, and developing user interfaces for Android apps to control robots wirelessly.
Programming the Arduino - Getting Started
You’ll start by installing the necessary software and uploading your first program within 30 minutes.
This hands-on approach ensures you gain practical experience right from the beginning.
The course covers the fundamentals of C programming for Arduino, including variables, data types, functions, scope, conditions, loops, and arrays.
You’ll learn how to write programs that control hardware components like LEDs and push buttons using digital pins.
Additionally, you’ll work with analog pins to interact with components like potentiometers.
One key aspect is learning to create multitasking programs that can perform multiple actions simultaneously, such as blinking LEDs at different rates.
You’ll also learn how to read user input from the serial monitor and store data in the EEPROM memory for persistence across reboots.
Practical activities are integrated throughout, allowing you to apply the concepts learned.
For instance, you’ll build a simple circuit on a breadboard, blink LEDs to create a Christmas tree effect, and optimize your code using arrays.
You’ll even create a program that lets the user choose which LED to power on using the potentiometer.
By the end, you’ll have a solid understanding of Arduino programming and be able to create dynamic, multitasking programs that interact with various hardware components.
The course also touches on object-oriented programming for Arduino as a bonus.
Arduino Bootcamp : Learning Through Projects
This course teaches Arduino through hands-on projects.
You’ll start with the basics of Arduino, setting up the IDE, and understanding programming concepts.
Then, you’ll dive into simple projects like controlling LEDs, buzzers, and using potentiometers.
As you progress, the projects become more advanced, incorporating components like ultrasonic sensors, seven-segment displays, and LED matrices.
You’ll learn about interrupts, shift registers, and how to interface with devices like the Wii Nunchuk.
Some highlights include building a digital dice, an infrared repeater that can record and playback signals, a joystick-controlled LED matrix game, and a stopwatch using shift registers.
You’ll also create an online weather station that retrieves data from an API and displays it on an LCD screen.
The course culminates with complex projects like a remote-controlled car using Bluetooth and an open-source phone that can make calls, send SMS, and tune into FM frequencies.
Throughout the course, you’ll learn essential concepts like pulse width modulation (PWM), debouncing, using third-party libraries, and working with various components like potentiometers, transistors, and motor drivers.
The course covers both hardware and software aspects, ensuring you understand how to integrate different components and write code to control them.
You’ll gain experience in breaking down complex projects into smaller tasks, debugging skills, and understanding advanced circuits and concepts.
Introduction to Embedded Systems
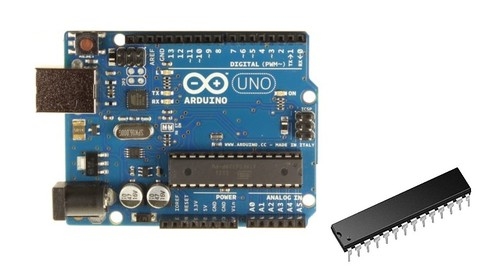
This course gives you an overview of working with microcontrollers, specifically the Arduino Uno board.
You’ll start by understanding the fundamentals of embedded systems, microcontrollers, and microprocessors, along with exploring alternative platforms.
Once you’ve grasped the basics, you’ll dive into the Arduino environment.
You’ll learn how to install the Arduino IDE and take your first steps with the Arduino Uno board.
This hands-on experience will familiarize you with the development process.
From there, the course focuses on working with LEDs, a crucial component in embedded systems.
You’ll learn how to produce digital output from the Arduino Uno, including controlling LED brightness and blinking patterns.
Additionally, you’ll work with RGB LEDs, allowing you to create dynamic lighting effects.
The course also covers digital input, teaching you how to accept input from switches and toggle LEDs accordingly.
This skill is essential for creating interactive projects.
Serial communication is another key topic covered.
You’ll learn how to transmit and receive serial data, enabling communication between the Arduino and other devices or computers.
Moving on, you’ll explore analog input, working with components like potentiometers, LDRs (light-dependent resistors), and temperature sensors.
This knowledge will allow you to create projects that respond to real-world conditions.
Throughout the course, you’ll encounter quizzes and practical exercises to reinforce your understanding and solidify your skills.
By the end, you’ll have a solid foundation in embedded systems and be well-equipped to tackle your own Arduino projects.