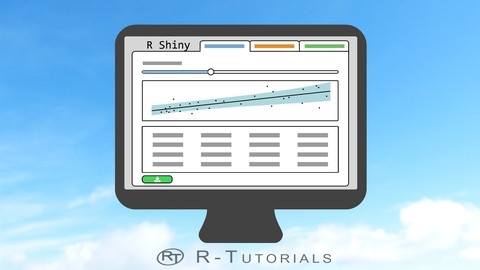
R Shiny Interactive Web Apps - Next Level Data Visualization

The course starts by introducing you to R Shiny, a powerful tool for creating interactive web applications directly from R.
You’ll learn how to set up the basic Shiny template and explore the Input Widget Gallery, which provides various tools for enabling user input.
The course covers the fundamentals of R Shiny, including working with input widgets, connecting them to the server, and using functions like render and reactive to create reactive applications.
You’ll also learn how to plan your app’s layout, create multi-page apps with tabsets, and incorporate HTML tags and shinythemes to style your app.
As you progress, the course dives into advanced Shiny concepts, such as publishing and sharing your apps on Shinyapps.io.
You’ll integrate tables using DT, add brush and click selection tools, and enable downloadable tables.
Additionally, you’ll learn how to incorporate various media types into your applications.
Hands-on experience is a crucial part of this course.
You’ll work on a course project, where you’ll analyze a provided dataset and build an interactive Shiny app.
The course provides detailed instructions and solutions for the project, ensuring you gain practical experience in developing Shiny applications.
These tools and concepts will equip you with the skills to create professional-grade, interactive web applications using R Shiny.
Building Interactive Apps With Shiny and R

You’ll start by learning the basics of Shiny, including setting up the environment and understanding the app structure.
Next, you’ll dive into Shiny inputs, exploring various types like text, numeric, checkboxes, selectors, sliders, radio buttons, and date pickers.
You’ll then build your first app incorporating these inputs.
The course covers Shiny outputs in-depth, teaching you how to display text, tables, plots, and DataTables.
Again, you’ll apply this knowledge by building an app focused on outputs.
Reactivity is a crucial concept in Shiny, and you’ll learn how to create reactive outputs, expressions, and control reactions.
This section culminates in another hands-on app building exercise.
You’ll master both single-page and multi-page app layouts, including vertical layouts, fluid rows, sidebars, conditional panels, tabsets, navbars, and navlists.
Each layout type has its own app building exercise.
The advanced topics cover data downloads, uploads, dynamic data refresh, progress indicators, and the structure of Shiny dashboards with headers, sidebars, and bodies.
The final project involves building a comprehensive Shiny dashboard, utilizing everything you’ve learned.
You’ll gain practical experience through numerous app building exercises along the way.
R Shiny Flex Dashboard Interactive Data Visualization

You’ll start by building your first Shiny application in under 5 minutes, learning the fundamentals of how Shiny works and why flex dashboards are useful.
The course covers essential topics like setting up your environment, avoiding common errors, and using templates to quickly create dashboards with any data.
One key focus is mastering reactive functions and Shiny evaluation, which are crucial for building interactive applications.
You’ll learn techniques like bulk column operations with dplyr and tidy evaluation, enabling you to manipulate data efficiently.
The course also dives into advanced dropdown menus and data visualization libraries like ggplot2, plotly, and highcharter.
A unique aspect is the section on graph network analysis using iGraph and visNetwork.
You’ll learn to convert scripts to functions, making your code more organized and reusable.
The course covers creating a standalone flex dashboard without Shiny, then adding interactivity with input boxes and render functions.
You’ll also learn how to output a single dataset to multiple visualizations like graph networks and data tables using reactive functions.
The course explores the benefits of graph network analysis for marketing and customer insights, positioning it as an important data structure.
Practical examples include handling missing values, email marketing analysis, loading large datasets quickly, and combining Excel files.
Dynamic dashboard filters and column selectors are covered, empowering you to build highly interactive applications.
The course concludes with a FAQ section addressing common queries like the R vs. Python debate.
RA: Supply Chain Applications with R & Shiny: Inventory.
You’ll start by learning the fundamentals of R, including data structures, calculations, importing data, and control flow statements like loops and conditions.
As you progress, you’ll dive into data manipulation techniques using the powerful dplyr package, mastering skills like filtering, joining, and reshaping data.
The course also covers reactive programming with Shiny, allowing you to build interactive web applications.
A significant portion of the course is dedicated to a real-world supply chain application - an inventory management system.
You’ll learn to connect to databases like SQL Server and MySQL, fetch real-time data, and implement an inventory algorithm that considers factors like seasonality, ABC analysis, service levels, and reordering quantities.
The course culminates in building a comprehensive Mango Stock inventory application with Shiny.
You’ll create a user interface with interactive visualizations like bar plots and pie charts, implement alarms and category management, and even explore size and color analysis.
Deployment is also covered, with lessons on scheduling tasks using Cron, debugging techniques, setting up virtual machines on Azure, configuring RStudio Server and Shiny Server, and establishing remote database connections.
Throughout the journey, you’ll work on assignments and projects that reinforce the concepts, ensuring a hands-on learning experience.
Shiny for Python Ultimate: Web Development with Python
You will start by learning the fundamentals of Shiny, including its high-level app structure, layout, control widgets, and reactivity.
The course then dives into building two real-world applications.
The first app focuses on visualizing the most popular programming languages, where you will learn data preparation and implementing the frontend and backend components.
The second app is more extensive, centered around climate change data.
You will set up the app, prepare the data, create the frontend with rows, columns, static content, images, and links.
The backend will involve implementing a world map, temperature plot, progress bar, and color mapping.
After building these applications, you will explore various deployment options, including shinylive.io, GitHub Gist, WebAssembly, GitHub Pages, and Posit Connect.
The course also covers potential pitfalls and provides additional information to enhance your learning experience.
Throughout the course, you will gain hands-on experience with coding exercises, ensuring you can apply the concepts effectively.
Build an A-Z Retail Dashboard with R & Shiny.

You’ll start by learning the fundamentals of R programming, including data structures, functions, loops, and conditions.
This lays the groundwork for more advanced data manipulation techniques using the dplyr package.
Next, you’ll dive into Shiny, a powerful framework for building interactive web applications with R. You’ll learn how to create user interfaces, handle user inputs, and generate reactive outputs like plots and tables.
Along the way, you’ll apply these concepts to build a retail dashboard prototype.
The course covers essential retail metrics such as margins, markups, conversion rates, and market basket analysis using the Apriori algorithm.
You’ll practice calculating and visualizing these metrics within the Shiny app.
To make the dashboard more robust, you’ll integrate a MySQL database hosted on an Azure virtual machine.
This involves setting up the VM, installing necessary libraries, and establishing a remote database connection from the Shiny app.
Throughout the course, you’ll work on building a fully-functional retail dashboard application.
This hands-on project will reinforce the concepts learned and provide a portfolio piece to showcase your skills.
Building Interactive Shiny Web Apps with R Programming
You’ll start by getting familiar with Shiny and setting up your development environment.
Then, you’ll dive into building your first web app, learning about the user interface and server-side components.
The course covers reactive expressions, which are crucial for creating dynamic and responsive apps.
You’ll also explore various input functions like text inputs, numeric inputs, date inputs, and limited choice inputs like drop-down menus and checkboxes.
Additionally, you’ll learn about file and action button inputs.
To solidify your understanding, the course includes exercises and real-world examples like building a BMI calculator app.
You’ll learn how to create the user interface, define the BMI calculation function, and integrate it into the server-side code.
Another exciting project is the IMDB Movie Explorer app, where you’ll work with a movie dataset.
You’ll set up the page layout with a sidebar and main panel, and use the dplyr package to filter and display movie data based on user inputs.
Finally, you’ll learn how to publish your Shiny apps, making them accessible to a wider audience.
Throughout the course, you’ll gain hands-on experience with output functions like textOutput(), verbatimTextOutput(), plotOutput(), and tableOutput().
These functions allow you to display text, code snippets, plots, and tables in your web apps.
Introduction to Maps in R Shiny and Leaflet

The course starts with an introduction and setting up the necessary tools.
You’ll then dive into building your first map - an earthquake map using OpenStreetMap data.
This involves creating a menu item, adding markers and circle markers, and generating a legend and layers control.
Next, you’ll learn to create a dark-themed earthquake map, adding another menu item and customizing the circle markers and legend.
The course also covers creating a heatmap visualization by adding a third menu item and incorporating heatmap data.
One of the highlights is the choropleth map section, where you’ll add a fourth menu item, download and transform data, prepare it for styling, and then create and style the choropleth map itself, complete with a legend.
Throughout the course, you’ll work with real data and learn techniques like changing the map based on zoom level.
By the end, you’ll have access to the complete source code for all the maps you’ve built, giving you a solid foundation to create your own interactive mapping applications using R Shiny and Leaflet.
LEARNING PATH: Shiny: Web Development with Shiny

You will start by learning how to set up your environment and run your first Shiny examples.
The course covers the building blocks of Shiny, including outputs like data tables, graphics, and animations, as well as various input controls.
You will dive deep into the concept of reactivity, which is at the core of Shiny’s interactivity.
The course teaches you how to control reactivity, handle errors, and debug your applications.
It also covers advanced topics like downloading and uploading data, fine-tuning graphics, and adding animations.
Moving on, you will learn how to develop user interfaces (UI) with Shiny.
This includes writing custom HTML and CSS, styling with Bootstrap, creating layouts with rows and columns, and adding navigation bars and menus.
The course also covers conditional UI, which allows you to dynamically show or hide elements based on user input.
You will learn how to create downloadable reports with RMarkdown and HTML templates.
The course also introduces you to Google Charts, which can be used to create interactive visualizations within your Shiny applications.
Throughout the course, you will build several projects, including a dashboard application, to solidify your understanding of the concepts.
The Complete Course of R Shiny 2024

You’ll start by learning the fundamentals of R Shiny, including what it is and how it works, along with examples of real-world applications.
Once you’ve grasped the basics, you’ll dive into setting up your development environment and creating your first R Shiny project.
The course covers both single-page and multi-page layouts, giving you flexibility in designing your applications.
A significant portion of the course is dedicated to building user interfaces (UI) with various elements like buttons, sliders, text inputs, and more.
You’ll learn how to customize the output area, display data tables, and create interactive plots.
The server-side logic is equally important, and the course teaches you how to implement reactive expressions and functions, control reactivity, and create dynamic UIs.
This will allow you to build truly interactive and responsive applications.
Connecting to data sources is a crucial aspect of any web application, and the course covers retrieving data from CSV, JSON, and SQL databases.
You’ll also learn how to upload and download data within your Shiny app.
Visualizations are a key component of many web applications, and the course covers using ggplot2 to create interactive plots within your Shiny app.
Additionally, you’ll learn how to create interactive maps using the Leaflet package.
Customizing the UI is essential for creating visually appealing and user-friendly applications.
The course covers advanced layout techniques using Shinydashboard and ShinydashboardPlus, as well as incorporating HTML tags, CSS, and Bootstrap into your Shiny app.
Finally, you’ll put your skills to the test by developing your own Shiny app as a project, solidifying your understanding of the concepts covered throughout the course.